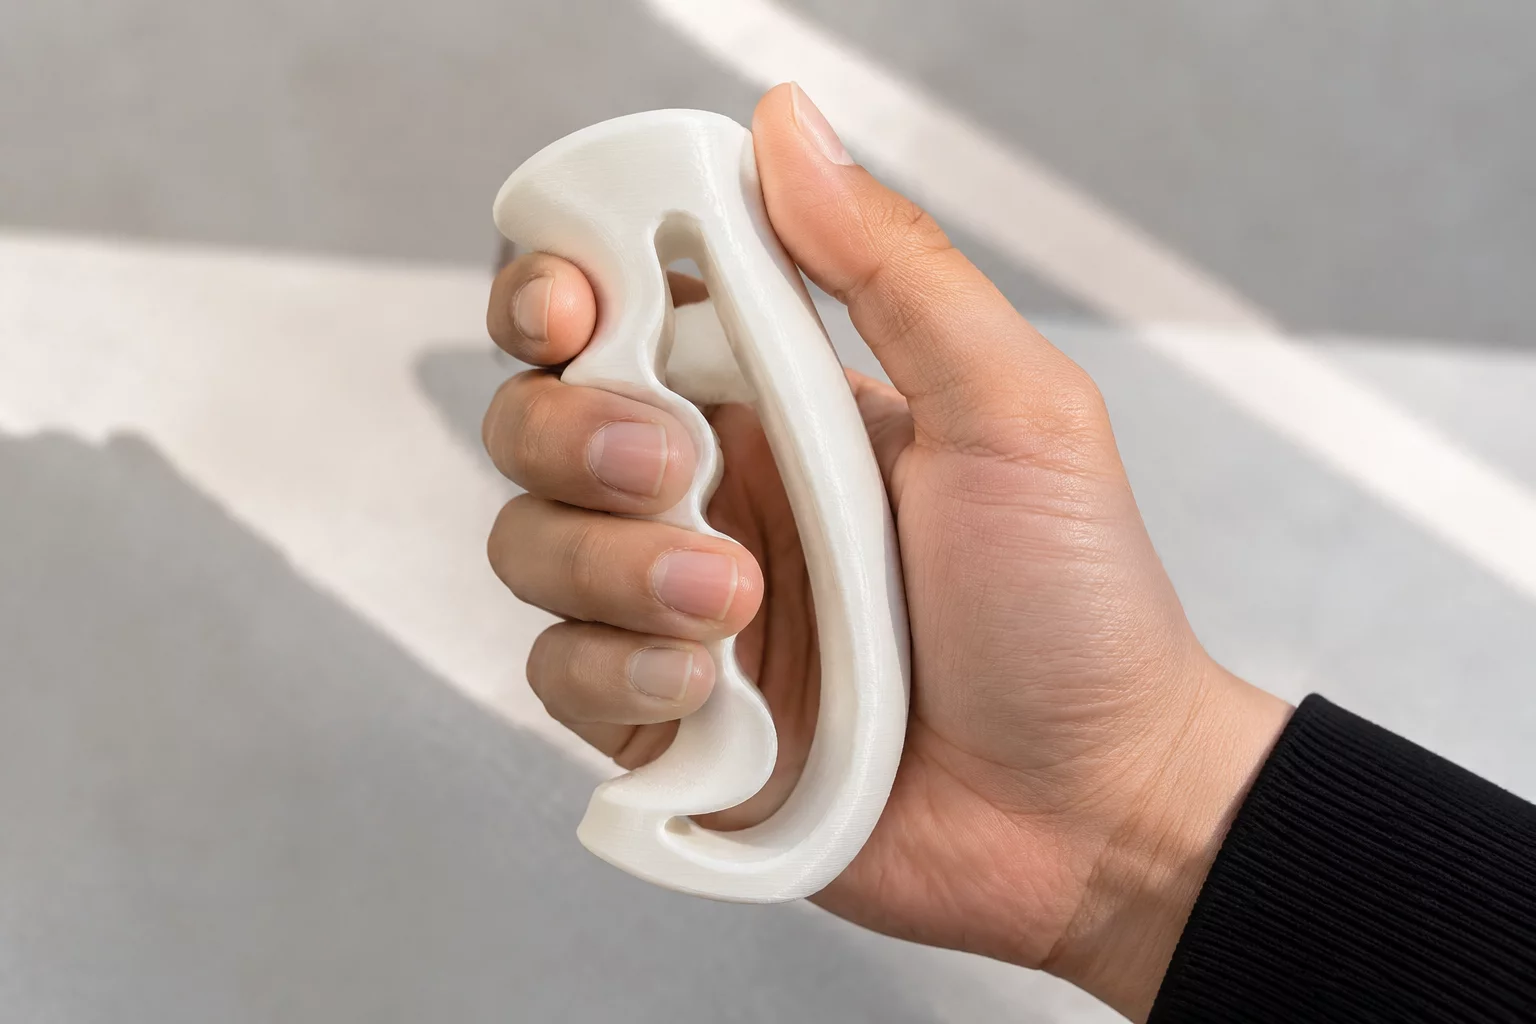
Classroom Scale & Dimension Objectives
Scaling objects to interface directly with the human body introduces an essential design constraint: absolute physical comfort cannot be arbitrarily resized. In virtual workspaces, students often scale items purely by visual instinct, producing handles that pinch fingers or tool grips that are too thick for a comfortable hold. This lesson anchors 3D modeling directly to anatomical data gathered through physical classroom measurements.
Learners analyze the geometry of the human hand, measuring palm width, finger diameter, and grip circumference before placing a single shape on the workplane. By translating these biometric data points into millimeter constraints, students uncover how functional ergonomics dictates product geometry, preventing common 3D printing failures where objects look proportional on screen but prove unusable in real life.
Proportion & Measurement Rule
Real-world ergonomics requires fixed anthropometric dimensions; scaling a handle uniformly by 150% ruins finger grooves, whereas adjusting only length or specific clearances preserves usability.
Step-by-Step Educational Workflow
Guide your students through three distinct phases to ensure their digital geometry accurately reflects physical hand anatomy and practical holding dynamics:
Stage 1: Physical Reference Measurement
Measure palm widths, individual finger spans, and closed grip circumferences using digital calipers and flexible tape rulers. Record both relaxed and tight grip metrics onto the measurement worksheet, noting that an extra 2.5 mm to 4.0 mm clearance is necessary for comfortable hand clearance.
Stage 2: Translating Values into Tinkercad
Open Tinkercad and construct a bounding box matching the measured grip envelope. Build primary cylindrical forms along the Z-axis, subtract subtle finger indentations with cylindrical hole shapes, and continuously check that the cross-sectional diameter does not exceed 32 mm for youth grips.
Stage 3: Testing Tolerances & Clearances
Print quick low-infill cross-sectional slice tests or measure virtual cross-sections against physical wooden dowel standards. Validate that fingers wrap naturally without pinching, verifying tolerance gaps along hinge joints or snap clips before moving forward.
Formulas and Spatial Checks
Calculating optimal handle dimensions involves balancing palm contact area against finger closure limits. Have students apply anthropometric reference guidelines to evaluate whether their CAD model maintains adequate clearance across diverse hand sizes:
- Palm Rest Width: Minimum 85 mm to 100 mm span across the primary contact surface to prevent palm edge pressure points.
- Grip Diameter Target: Maintain 28 mm to 34 mm outer diameter for optimal grasp strength without inducing hand fatigue.
- Finger Groove Spacing: Allocate 18 mm to 22 mm center-to-center pitch between individual finger rests with generous 3 mm fillets.
When students finish their prototypes, perform peer fit tests where classmates with different hand dimensions evaluate comfort and stability. Documenting these tactile evaluations helps learners understand why adjustable mechanisms or universal sizing standards are widely adopted across industrial manufacturing and consumer product engineering.
Marcus Vance
Middle School STEM TeacherWe tested this activity with our 8th grade engineering class last week. Having students measure their own grip circumferences before touching Tinkercad completely changed how they approached modeling handles—no more paper-thin grips!